
He Locked Out the Power — But the Charger Was Still Live
A near-miss investigation into dual-source energy hazards when troubleshooting forklift battery chargers. An AC lockout isn't enough when the DC battery is still connected.
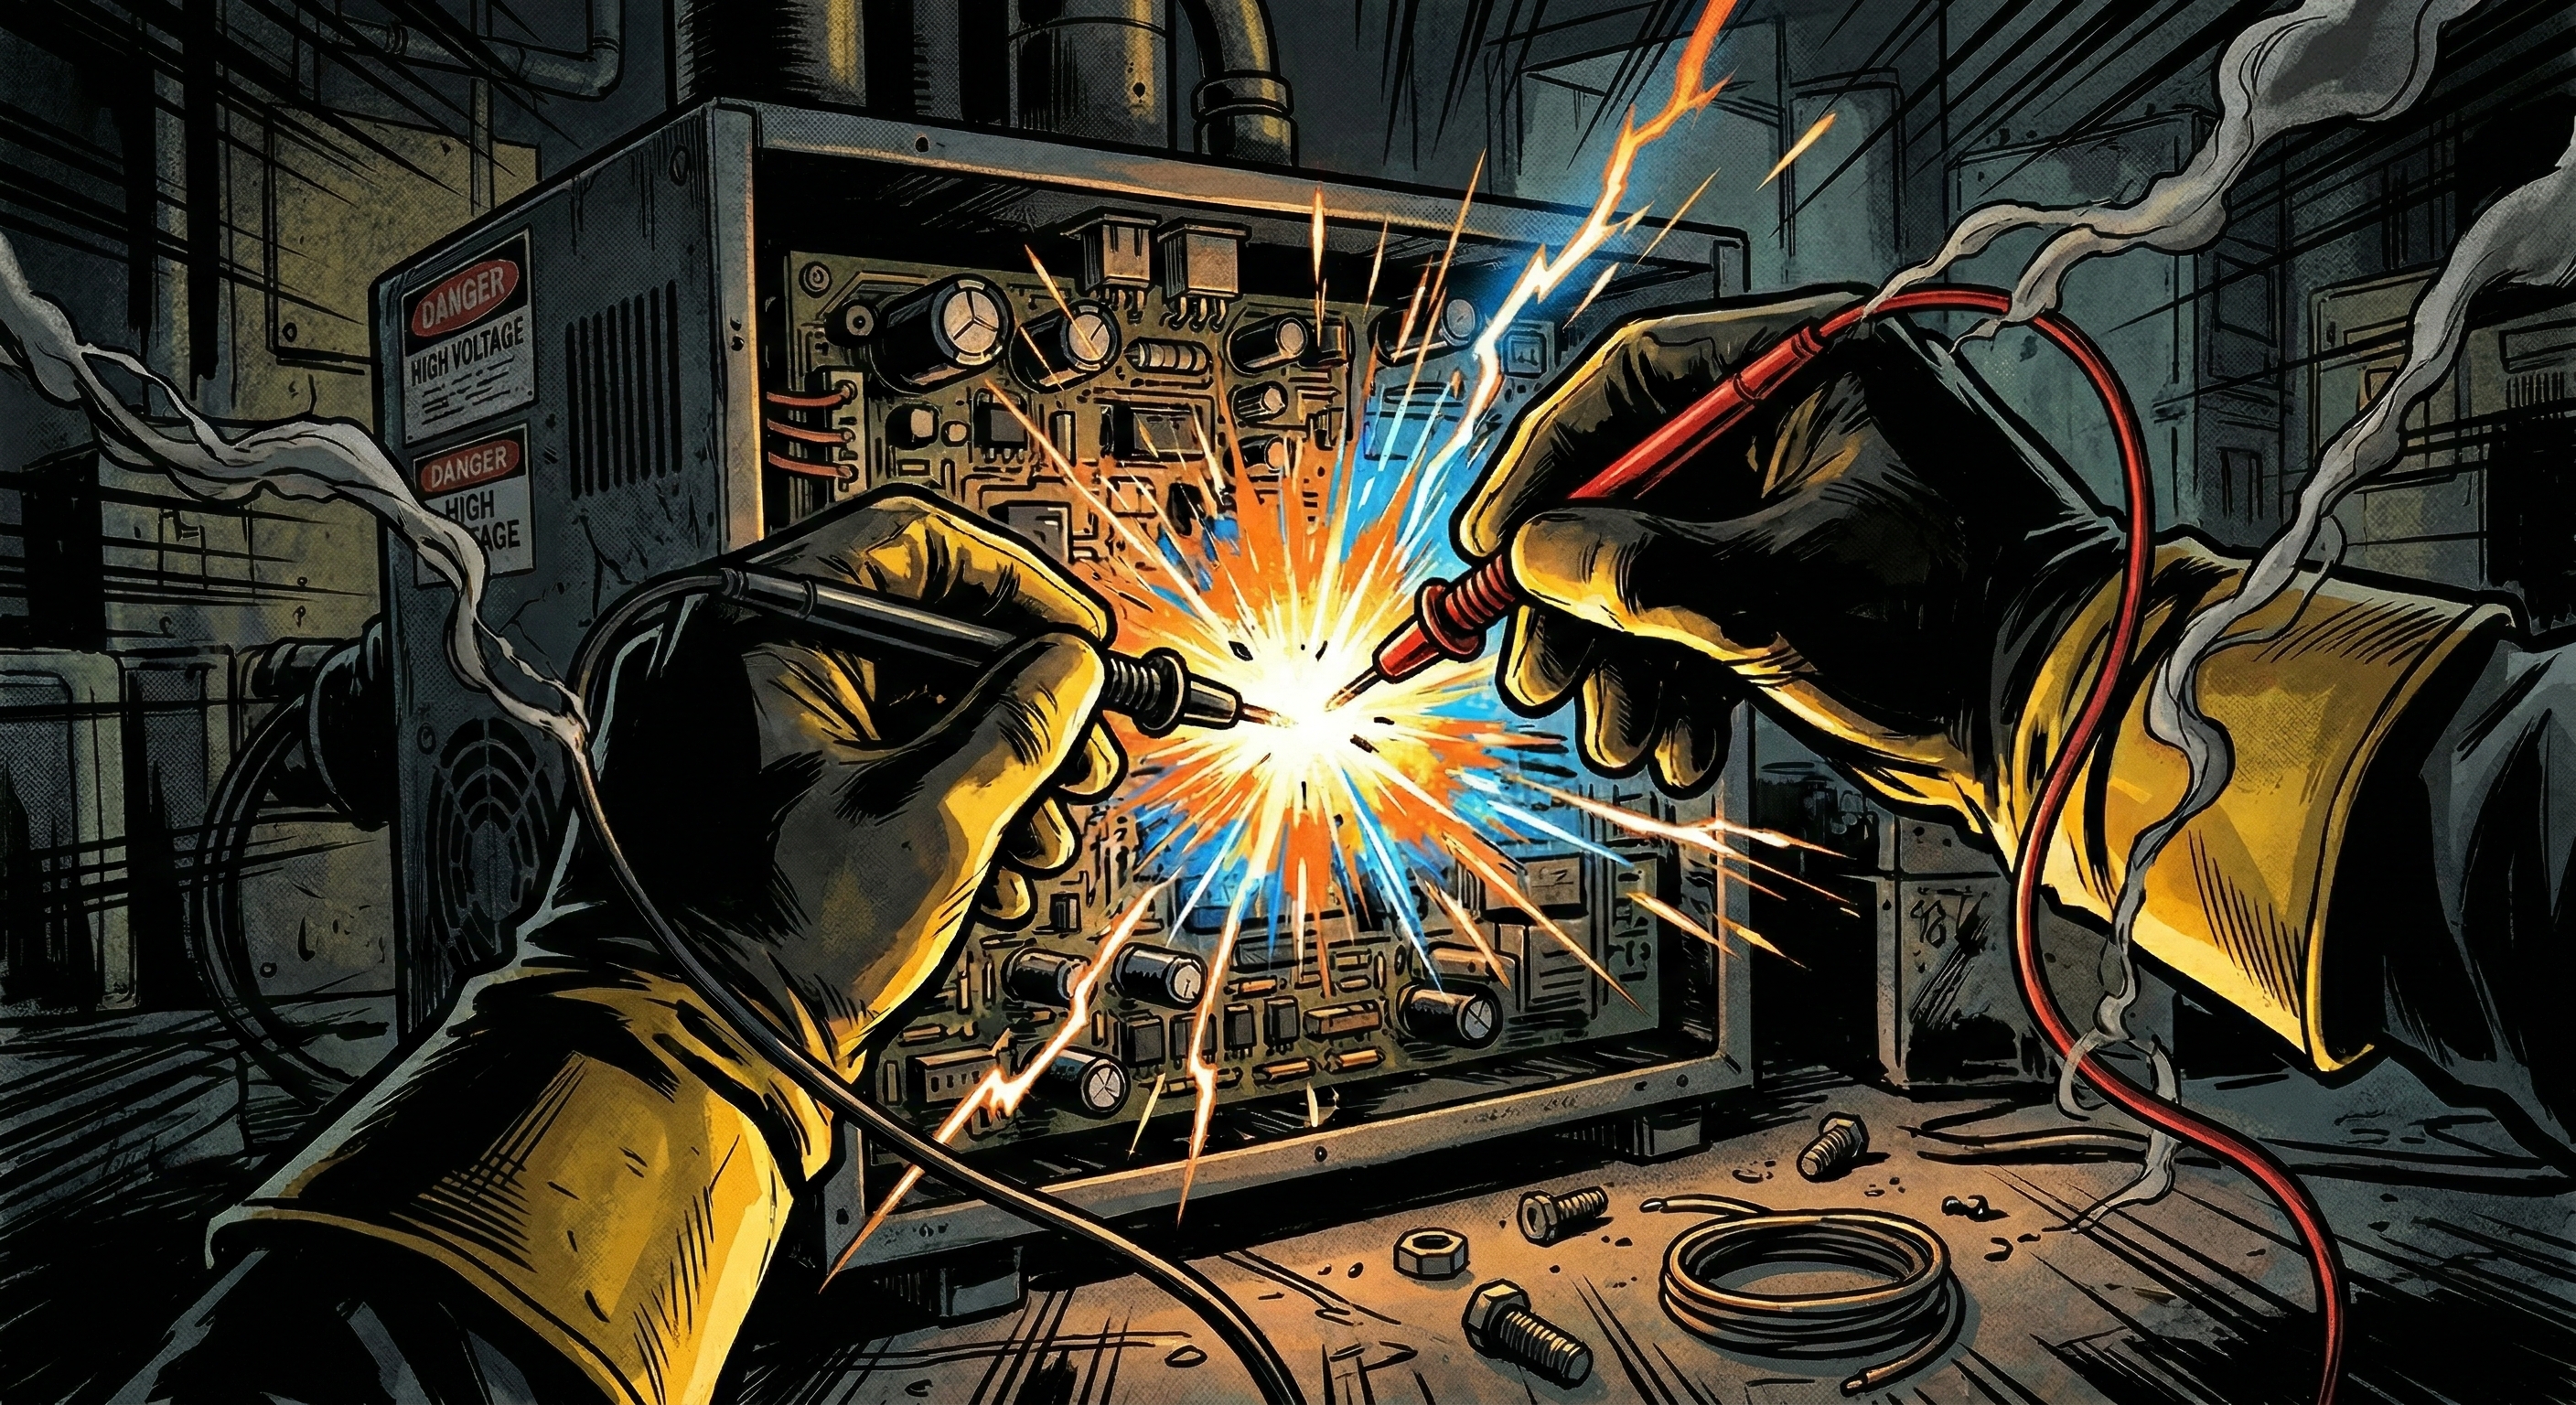
The Flashpoint
The electrician smelled it before he saw it — a sharp, acrid burn. The red test lead in his right hand had gone soft. The insulation was melting. He pulled back, but the damage was already done: both meter leads were destroyed, the probe tips blackened, the cable scorched halfway to the meter body.
He had locked out the breaker. He had hung his tag. He thought the charger was dead.
It wasn’t.
The Setup
The job was straightforward — at least on paper. A 48-volt forklift battery charger had stopped completing charge cycles. The charger uses SCRs (silicon controlled rectifiers) and diodes to convert incoming 120V AC into regulated DC charging current for the forklift’s lead-acid battery pack. When a charger won’t charge, those semiconductors are the usual suspects.
The electrician walked up, identified the 120V AC input breaker, locked it out, and tagged it. Standard procedure for working on a charger — or so he thought.
What he didn’t do was disconnect the forklift battery from the charger’s DC output terminals.
That battery pack — 24 cells of lead-acid at roughly 2 volts each — was still connected. And a 48-volt DC industrial battery supply doesn’t care that the AC breaker is open. It can still push current backward through the charger’s DC bus, through the very diodes and SCRs the electrician was about to test.
He selected what he believed was the right meter function, placed his probes on the first SCR — and the leads burned.
The Breakdown
Here’s what happened electrically.
When the AC breaker was locked out, the charger lost its input power. But the battery was still bolted to the DC output. That means the charger’s DC bus — including the SCR and diode stack — was still energized at battery potential. Depending on the charger topology and the state of charge, some of those semiconductor junctions were still conducting or were sitting at battery voltage with a near-unlimited current source behind them.
Now consider the meter. To test diodes and SCRs properly, you use the diode test function or an ohmmeter. Both work by injecting a small test current through the component and measuring the voltage drop. They are designed for de-energized components only. If the component is still connected to a live source, the meter doesn’t control the current — the source does.
The most likely scenario is one of three things:
Scenario 1 — Current jack error. The red lead was plugged into the A (amps) or mA jack instead of the VΩ jack. The current input terminals on a DMM have nearly zero internal resistance — they’re designed to be inserted in series with a circuit. Place them across a voltage source, and the meter becomes a dead short. At 48 volts with a battery capable of delivering hundreds or thousands of amps of fault current, the leads become fuses.
Scenario 2 — Diode/ohms test on an energized circuit. Even with the leads in the correct jacks, attempting a diode check or resistance measurement on a component that’s still connected to the battery creates an undefined condition. The meter’s small test signal gets overwhelmed by the battery’s voltage and current. The result: unpredictable current flow through the leads.
Scenario 3 — Inadvertent short across battery-backed nodes. The probes may have bridged two points on the charger that were at different potentials relative to the battery, creating a fault path through the meter leads.
In any of these cases, the outcome is the same: the meter leads carried far more current than they were rated for. They burned.
The Root Cause Analysis
Direct Causes
- Incomplete energy isolation. The electrician locked out the AC input but did not disconnect the 48V battery. The charger remained energized on the DC side. For semiconductor testing — which requires a completely de-energized component — this is not a safe condition. Every charger service manual reviewed for this type of equipment states the same requirement: disconnect AC power and disconnect the battery before testing SCRs or diodes.
- Incorrect test method. The SCRs and diodes were tested in-circuit with the battery still connected. Proper charger semiconductor testing requires isolating the component from surrounding circuitry — disconnecting gate leads, input conductors, and output connections — before applying an ohmmeter or diode test function. This wasn’t done.
- Probable meter configuration error. The burned leads are the signature of a meter that was turned into a low-impedance fault path. The most common way this happens: the red lead is left in the A/mA jack from a previous measurement, and the technician probes across an energized source without checking jack positions first.
Systemic Causes This is where the real lessons are.
- No charger-specific lockout procedure. Most facilities have generic LOTO procedures that focus on a single supply breaker. But forklift chargers are dual-source equipment — they have an AC input and a DC battery connection. If the LOTO procedure doesn’t explicitly call out the battery as a hazardous energy source requiring isolation, electricians will default to what they know: lock out the breaker, hang the tag, start working.
- No task-specific hazard assessment for semiconductor testing. A proper JSA or FLHA for this task should identify: (1) the battery as a second energy source, (2) the requirement to verify zero voltage on the DC bus, (3) the requirement to isolate the device under test from surrounding circuitry, and (4) the correct meter configuration for the planned test. If this assessment was done at all, it didn’t catch the battery hazard.
- Training gap on dual-source equipment. Electricians are trained to think in terms of supply breakers. Lock out the breaker, verify dead, work safe. But battery-backed equipment — chargers, UPS systems, DC drives, solar inverters — breaks that mental model. The energy doesn’t come from the panel. It comes from the load side. If technicians aren’t specifically trained on backfeed hazards from stored-energy sources, they will miss it.
- No meter discipline standard. There was no systematic pre-contact check — verifying lead jack positions, dial function, and expected reading before touching probes to circuit. Fluke identifies wrong-function selection and current-jack misuse as two of the most common multimeter errors. Without a formalized check step, these errors become a matter of individual habit rather than system control.
Actionable Takeaways
The Rule AC lockout alone is never enough on battery-backed equipment. If a charger, UPS, battery bank, or any dual-source device has a DC energy source connected, the equipment is not in a zero-energy state — no matter what the breaker says.
The 7-Step Forklift Charger Safe Testing Standard Before any diode, SCR, resistance, or continuity testing on a forklift charger:
- Disconnect the AC input — lock out and tag the supply breaker.
- Disconnect the battery — physically separate the DC cables from the charger’s output terminals. This is not optional.
- Verify absence of voltage on the charger’s DC bus using a prove-test-prove sequence: test your meter on a known live source, test the charger DC bus, re-test the known live source.
- Discharge any capacitors in the charger’s power section as required by the service manual.
- Isolate the device under test — disconnect gate leads, input wiring, and output connections from the SCR or diode block before testing.
- Verify your meter setup — red lead in VΩ jack (not A/mA), dial set to diode test or the correct ohms range, probes in good condition.
- Test per the OEM procedure only — not from memory, not from habit.
The Meter Discipline Check Every time you pick up a meter, before probes touch anything:
- Black lead → COM. Always.
- Red lead → VΩ for voltage, resistance, diode, and continuity measurements. The red lead goes in the A/mA jack only when you are intentionally measuring current in series with a circuit.
- Dial position matches your intended measurement. Say it out loud or confirm with your partner.
- Prove-test-prove before relying on any absence-of-voltage reading.
The Bottom Line: This wasn’t a “meter failure.” It was a systematic troubleshooting failure: incomplete energy isolation, no zero-energy verification, in-circuit testing on an energized device, and probable meter misapplication. Every one of these failures had a procedural fix. None of them required new tools or new technology — just discipline applied to an established process.
Special thanks and contribution by Darryl Krause.
Guess the Root Cause
The electrician locked out the 120V AC input breaker. Why was the charger still energized?
Community Discussion
Join the conversation. What are your thoughts on this incident or safety topic?
Comments will appear here once the Giscus GitHub repository is linked.